Contest

Win Rihannas new album Talk That Talk!

Dagger and Arrow GET WET TOUR!

Dagger and Arrow will be touring the province this summer, complete with t-shirts and giveaways for everyone!

Hair and Pregnancy

What to expect from your hair when you are expecting!

Dreads! Do's and DON'T's

Everything you need to know about starting your dread journey!

How to handle awkward questions! "Can I touch your hair?"

Find out great ways of answering taboo questions from curious people.

Wednesday, May 16, 2012

Grad Hair 102

Its still grad and prom week! and as promised here are five more sexy styles perfect for graduation and prom!  

The Bump

How to Get the Look:
Step 1: To create some volume on top, curl the roots of your hair in two-inch sections just once around a large-barrel curling iron. Curl the entire section between your hairline and crown, from temple to temple.
Step 2: For even more fullness, tease the roots of the hair you just curled with a mixed-bristle brush. Then use the same brush to smooth out some hair over it.
Step 3: To keep your bump from deflating, take a two-inch section of hair above each ear, twist it, and secure with bobby pins in the back of your head, below your crown. Use a light hairspray so your twist will stay in place and to tame flyaways.

Twisted Bun

How to Get the Look:
Step 1: Make a deep left-side part and gather the top section of hair from your forehead to your crown. Apply a squirt of texturizing spray, and then roll the hair away from your part to form a tight twist. Hold the twist tightly while you grab an elastic.
Step 2: Pull the rest of your hair into a low pony behind your left ear, and secure the ends of your twist in the ponytail too. Separate the pony into two sections. Twirl one section into a twist, and wrap it around the elastic to make a small bun, leaving the hair in the other section loose.
Step 3: Pin the ends of the small bun against the back of your head. Next twirl the rest of your loose hair into a twist, and wrap it around the outside of the smaller bun; pin the ends underneath. Smooth flyaways with a dab of 

Glam Braids

How to Get the Look:
Step 1: Keep hair in place by creating a deep side part, then use a mixed bristle brush to smooth down flyaways and frizz.
Step 2: Apply a small amount of pomade to your fingers to give shine and hold to the braid. Start French-braiding a three-inch piece of hair at the full side of your part.
Step 3: Pull the rest of your hair into a low side ponytail. Wrap the ponytail around its base to form a bun. Secure with bobby pins.
Step 4: Hold your style in place with a mist of light-hold hairspray. Apply a little extra on the braid to keep it from unraveling.

Boho Braids

How to Get the Look:
Step 1: Blow-dry hair straight to make it easier to braid. Part your hair in the center.
Step 2: Separate out a 1-inch section on both sides of part — two inches back from hairline. Take a 2-inch piece above each ear, and clip out of the way. Pull the rest of hair into a low bun. Bobby-pin it against the nape of neck, and tuck in the ends.
Step 3: Braid each of the top sections down; pin the ends into your bun. Then braid the side sections over the top of your head. Pin the ends against your head, and smooth them with pomade.

Romantic Ringlets

How to Get the Look:
Step 1: For perfect pin curls no matter what your texture, wrap three-inch pieces of damp hair around your finger as if it were a curling iron; slide finger out and pin curls to your head.
Step 2: Remove the pins, then define your curls by scrunching a golf-ball-size amount of Dagger & Arrow GELI to define clurs.

Tuesday, May 15, 2012

Grad Hair 101


Keeping with this weeks prom theme, here are some amazing styles found my by Amanda Pressner of seventeen mag. Enjoy!

Roman Ponytail

How to Get the Look:
Step 1: Comb your hair back into a sleek ponytail at the crown of your head. Use a fine-tooth comb to help smooth any bumps.
Step 2: Dip your fingertips into Dagger & Arrow Butter Cream, then lightly run them over your hair — it will maximize shine and fight frizz all night long.
Step 3: Tie a metallic piece of silk cord around the base of your pony, leaving two long pieces on either side. Crisscross them down the length of your pony. When you get to the end, wrap them around tightly a few times, knot the cord, then snip the excess.
Tip:
Gently pull sections of your pony with your fingers for a more volumizing shape.

Sleek Twist

How to Get the Look:
Step 1: Blow-dry your hair straight, using Dagger & Arrow Butter cream or GELI to keep it smooth and add hole, then part it on the side.
Step 2: Split your hair into pigtails, and begin twisting each side, starting from your temples and working you way back.
Step 3: As you reach the nape of your neck, twist hair tighter until it coils against itself. Use bobby pins to secure the coils against the back of your head.
Step 4: Mist all over with shimmer spray.

Silky Curls

How to Get the Look:
Step 1: Apply a texturizing product to freshly washed hair, then blow-dry on a low speed with a diffuser attachment — it will help bring out even more texture.
Step 2: With a small dab of Dagger & Arrow GELI on your fingertips, sweep your hair to one side, leaving it loose and flowy. On the same side, separate a three-inch section from just above your ear and roll upward into a twist, and bobby-pin it.
Step 3: Using a boar bristle brush, gently brush out the rest of your hair to loosen the curls and make them look softer.

Crazy Crimps

How to Get the Look:
Step 1: Mist dry hair with a thickening spray. Crimp two-inch sections, clamping the crimper as close to the roots as possible. Hold in place for a few seconds, then move down the length of hair. Crimp the whole head except for the front.
Step 2: To fluff out your crimped strands, tease them with a brush: Hold the ends of a two-inch section straight up, then brush it toward the roots until each piece is majorly full.
Step 3: Brush back the front section of hair, and secure at the crown with an elastic. Spritz the front with Dagger & Arrow Spritz to smooth down flyaways and add shine.

Fancy Chignon

How to Get the Look:
Step 1: Braid a two-inch section of hair at your hairline toward the back of your head, and secure with an elastic.
Step 2: Gather the rest of your hair along with the braid into a ponytail, and secure with a rubber band. Tightly twist your hair into a smooth side bun. Fasten in place with a few bobby pins.
Step 3: Pin three sparkly clips along your braid, then smooth on Dagger & Arrow Butter Cream to add a glossy sheen.
Tip: Tame any frizz along your hairline by smoothing on a dab of Dagger & Arrow Deep Conditioner with your fingers.

Come back tomorrow to get FIVE more awesome styles!!

Monday, May 14, 2012

Prom and Grad Week!


Ah yes! Prom and graduation, the time that every high school girl who has dreamed of being ‘Prom Queen’ has waited for. Also the time that everyone in college has waited and worked hard for, for the last 3+ years. In celebration of prom/grad this year, we decided to focus this weeks posts on prom and grad hair. Today we're going to look at five tips on how to get length before prom.

  1)      Protective Styling- Styling your hair in a protective style such as braids or twists will give your hair an ideal environment for growth. Safe from breakage and elemental damage, protective styles are a MUST, especially  if you have curly hair.

  2)      Moisturise- Use Dagger & Arrow Butter Cream to keep hair moisturised soft. Remember once it has emerged from the scalp the hair on your head get no more help from the tissues that created. It literally is hanging there by a thread! You must do your best to make sure your hair is quenched, not dry and fragile.

    3)   Stretching your hair- This may sound odd, but did you know when it comes to lengthening, hair is at least 5% elastic? Hair in its natural state is highly composed of keratin. In its natural state keratin A looks like a tight spiral. However if you were to say, braid your hair after the shower forcing it to dry in its stretched state, that keratin will then be arranged into keratin B, a more elongated form of keratin. The hair then enters and state called ‘floating’ where it can elongate by 25% and without effort the keratin A is now Keratin B.

   4)      Watch the water!- Water is good for hair to an extent. It does a good job of swelling the shaft and allowing for natural ingredients to penetrate your hair without much damage. In fact the affect that water has on hair is the reason most hair dye is liquid! However too much of one thing is never a good thing. When you take a shower make sure to dry you hair with a t-shirt and close those cuticles with Dagger & Arrrow Butter Cream! Unlike a towel, a t-shirt will soak up excess water and has less of a chance of sapping the vital oils from your hair.

Sebum.
   5)      The more greasy the better- Believe it or not grease on your hair is actually known as sebum. Your hair needs this sebum. It protects the hair from the elements as well as flexibility and shine. When you cleanse your hair, try not to scrub too much!


Hope you all enjoyed these tips!Check back for more prom and grad hair tips all this week!

Friday, May 11, 2012

The Ever Sweet Cerise


To celebrate Mothers day (early) I have decide to focus our Friday post on my very own mother Cerise Fairfax. Surprise mom, love you!

My mother Cerise is an inspirational life coach, who has worked with the likes of Mark Strong, Devo Brown, DJ Starting from Scratch and many more! Currently residing in the beautiful downtown city of Toronto, she writes horoscopes for more than five publications across Canada! 
Being someone who has always been focused and able to overcome adversity she has been changing lives and giving advice to virtually hundreds of people for more than 20 years!

Born in Ontario My mother grew up in the heart of down town Toronto with her three sisters (Autumn, Darla and Audra) and her brother (Keith). Though her childhood was not always easy growing up in Regent Park, she made the best of whatever hand she was dealt and excelled as an individual and strong leader.


Having a locally renowned picker/upholsterer and a funkdafied Native-Afro-American for parents, it was only natural for my mom as a teen to hold on to her leadership qualities and became a trend setter in her neighbourhood- in fashion, music and beauty. Much like her father before her she found a creative outlet in antique hunting and thrifty finding, she would make her own clothes, jewelry and even hair gel! Inspired by the architecture of old cabbage town and the surrounding area, my mom had a pop-punk style all her own.

Through the years I have watched my mom change and grow, especially her hair. It has been bobbed, dyed bright pink, brown and blonde. It’s been teased, blow dried and pinned. It’s been braided and straight as well as naturally curly but most of all it has been loved!

My mother Cerise has amazing type 3C curly hair. If you have this type of hair, try these tips!

-Condition your hair! Hydration is key when you get into the more curly types of hair. Breakage occurs in this hair type more often and hydration will stop your hair from drying out and breaking off. Try Dagger & Arrow Butter Cream to lock in moisture after the shower.

-Take your time with this hair and treat it delicately. Remember if you get what you pay for when it comes to hair products so don’t scrooge out on your hair!

-Try wet sets to control frizz and fly away hairs, and remember to use Dagger & Arrow GELI to nourish your hair and maintain style. 

Thursday, May 10, 2012

Tips for doing African American and mixed girls' natural hair


Here are the remaining tips of seven on how to care for mixed and African American hair. Enjoy!

4. Plaits - can be done in multiple sections, you start one but you can do an infinite number depending on the style. Women typically add barrettes, baubles and elastic bands to the ends to hold the plait together.
Plaits are a great way to start caring for short hair, so as soon as a child has enough to pull together, even twist use rubber bands.
Plaits are parted in threes when you are creating pig tails then twisted or intertwined around each other. Make sure you have bands for the ends.

5. Braids - last from two weeks to a month or more depending on how small they are and how tightly they are pulled. You really need to measure how tightly you pull the hair because it can cause damage to the scalp and cause extensive irritation in some cases it pulls hair out at the follicles.
Braids are parted into threes when you are braiding hair close to the scalp in cornrows. You need to keep rubber bands on hand black and clear ones are great but whatever you have that will hold the ends of your rows is great.


6. Brushing black natural hair is important. Actually vital to hair growth and cleanliness but you need to be attentive to how hard you brush what type of bristles are used and being careful about stimulating the scalp, stimulating blood circulation.
The best way is to always section off the hair as many times as necessary to start at the end of hair shaft detangling as you get closer to the scalp.
7. Combing is also very important, it helps with removing shed hair and detangling the hair shafts, this is always best done with a pick or a wide tooth comb. Butparting hair is always done best with a rat tail comb - using the rat tail end, usually giving straighter lines when parting hair.

When using the comb to detangle or loosen hair strands it is always better to start at the root coming from the scalp , bit by bit after sectioning off hair but you must be careful, holding the sections as you comb through.

Tip letting kids wear afros are a chic thing to do these days, but you must have a afro pick, good moisturizers and attentive care.Hair bands are great for little girls!

Wednesday, May 09, 2012

Seven tips for doing African American and mixed girl's natural hair


Introduction to black hair!

The earlier you start combing your child's hair the better! When they are first born and wee things we tend to brush it and stroke it but it must be combed and brush on a daily basis. The sooner you get into the habit of combing through your daughter's hair the better for you and the child. It becomes a routine!

Black hair varies in all natural textures and even shades, naturally. It must also be well moisturized, washed and maintained. With little black girls, biracial girls and even some other ethnic groups present a challenge for mothers and fathers wishing to grow, keep and maintain their precious little princess' locks, curls, plaits or braids

I know a lot of people want to relax their daughters hair as quickly as they can because it takes a lot of the work out of doing hair. But i always suggest that you wait as long as you can, at least until the child starts school about five or six years old, if you plan to do it on your own. Or find someone who is good with kids and good at doing little girl's relaxers and someone you trust to do the chemical treatment.

And when you do decide to go with a relaxer don't relax the child's hair completely straight, you just want to be able to style it yourself, making it manageable! Relaxing it completely straight could start the cycle of damage and dryness you want to avoid at an early age.

A straighting comb is another option but since this is a really delicate task i don't even recommend this until a child is at least ten to twelve. But it is a lot gentler if you want to keep the girls hair as close to natural as possible


1. Cleaning natural black hair is a weekly task for caregivers.

Choosing the right shampoo and conditioner is always a trial and error expedition for first time momma's, unless they already have a product they have tested and tried and wish to use on their daughters.
Tip is you should use the most natural product that will add moisture to scalp, and hair.

2. Using a hair oil and moisturizer is necessary for growth and everyday hair care.
Once again choosing the right oil is a trial and error expedition unless you already have a natural product that will be gentle and beneficial to growing and maintaining healthy hair.
The child's hair must be oiled every day or every other day depending on the product and how much your daughter's hair absorbs.
Tip use natural oils like olive oil, coconut oil and tea tree oil are some of the best.
Massaging the oil into the child's scalp and throughout all the hair all the way to the ends. The best way to get it all through the child's hair is to part the hair into section that are workable with a rat tail comb.

3. Drying natural hair can happen two ways :


A. Letting hair dry naturally to a damp feel - leave hair about 30 minutes to air dry. Then combing the hair as you would like but not for cornrow braids. But damp hair is great if you plait it, depending on hair texture it leave hair wavy when it is completely dry, preventing tangles and making hair manageable.

B. Using a blow dryer - dry hair in sections completely, brushing continuously unless you have a dryer with a brush or comb attachment.

Adding gel or a leave in conditioner is also vital for hair if you are looking to smooth it down but you need to make sure these products don't contain alcohol because it leads to drying and breakage. Add them when the hair is damp.

Tip you can use them but not for long periods of time and make sure you wish them out within a few days or hours.

C. Cornrow braids should be done when the hair is completely dry, well oiled and detangled. Braiding is easy but it takes persistence and practice to get it right and while you are doing this you must dedicate yourself to figuring out how you and your child can work together.

You must be willing to spend the hours and make the child enjoy the experience so you need to involve them in the process that can take up lots of hours. You do not want this experience to be horrific and the more fun you can have makes it easier on the child and your nerves will survive.

Check back all this week for the other four tips!

Tuesday, May 08, 2012

Curly Baby Tips


Continuing with our Mothers Day week special here are a couple more tips to help you with your baby's beautiful tresses.

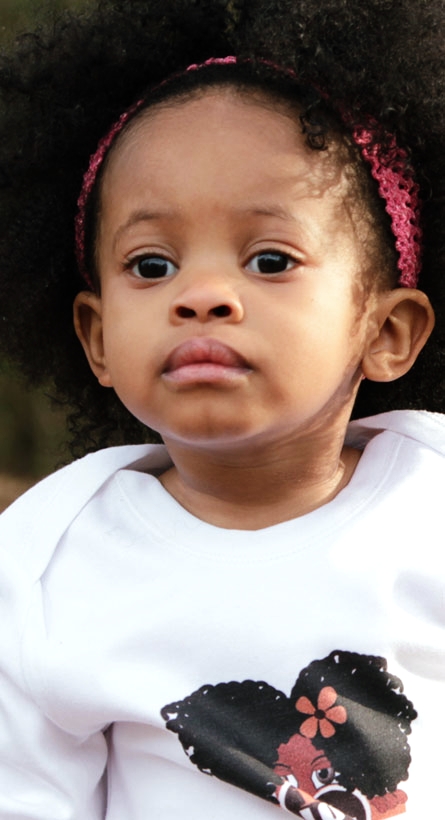
THREE:Protect your baby's hair with proper styling. If at all possible, leave your child's hair as natural as possible. Curly hair is already fragile, excessive heat and styling methods that pull the hair (i.e. ponytails) may only make your child's hair more susceptible to breakage. Don't pull your child's hair too tightly and do not use cheaply fashioned rubber bands on your child's hair. They can snag and pull, causing splitting and breakage. Do not brush your child's head too harsh. Try using wide tooth combs instead.

FOUR:Use due diligence to stimulate your baby's hair growth. Protect your child's head from damage or breakage during appropriate weather conditions. Babies' heads need to be protected from all types of weather, especially excessive heat and cold. Also, buy a satin pillowcase for your baby.

Rest assured, your baby's hair can grow and it will grow if you use the right techniques for their curly, ethnic hair. Curly hair needs love and great care. To detangle African American hair even more, and encourage growth and bring out curls, also spray the hair with an even mixture of water and olive oil or grapeseed oil daily.